Showing posts with label stencils. Show all posts

Thursday, June 13, 2013

Live the Life You Have Imagined


I am getting the hang of this retirement thing.

Over 30 years ago, Steve and I participated in a 3 day retirement planning seminar with his company.

One exercise asked us to visualize ourselves in retirement.

I imagined myself walking on a beach and creating whenever/whatever I wanted.

Well, this week I have definitely been living the life I imagined and working on my 30 Days of Pinterest project.


I ordered linen napkins and a tablecloth from Save-On-Crafts a couple of weeks ago to make an alphabet tablecloth like one I saw on Dreamy Whites.


I wanted to use blue just to be different, but I couldn't get the lid off the jar and I didn't want to wake Steve ( I start many of my projects about 11:00 p.m.) so I went with my standard red.

Hand painted letters are just too much work so I used stickers to create a reverse stencil.

With 26 letters and only 47 inches, I had to get creative and stagger the height of the letters across the length of the cloth.

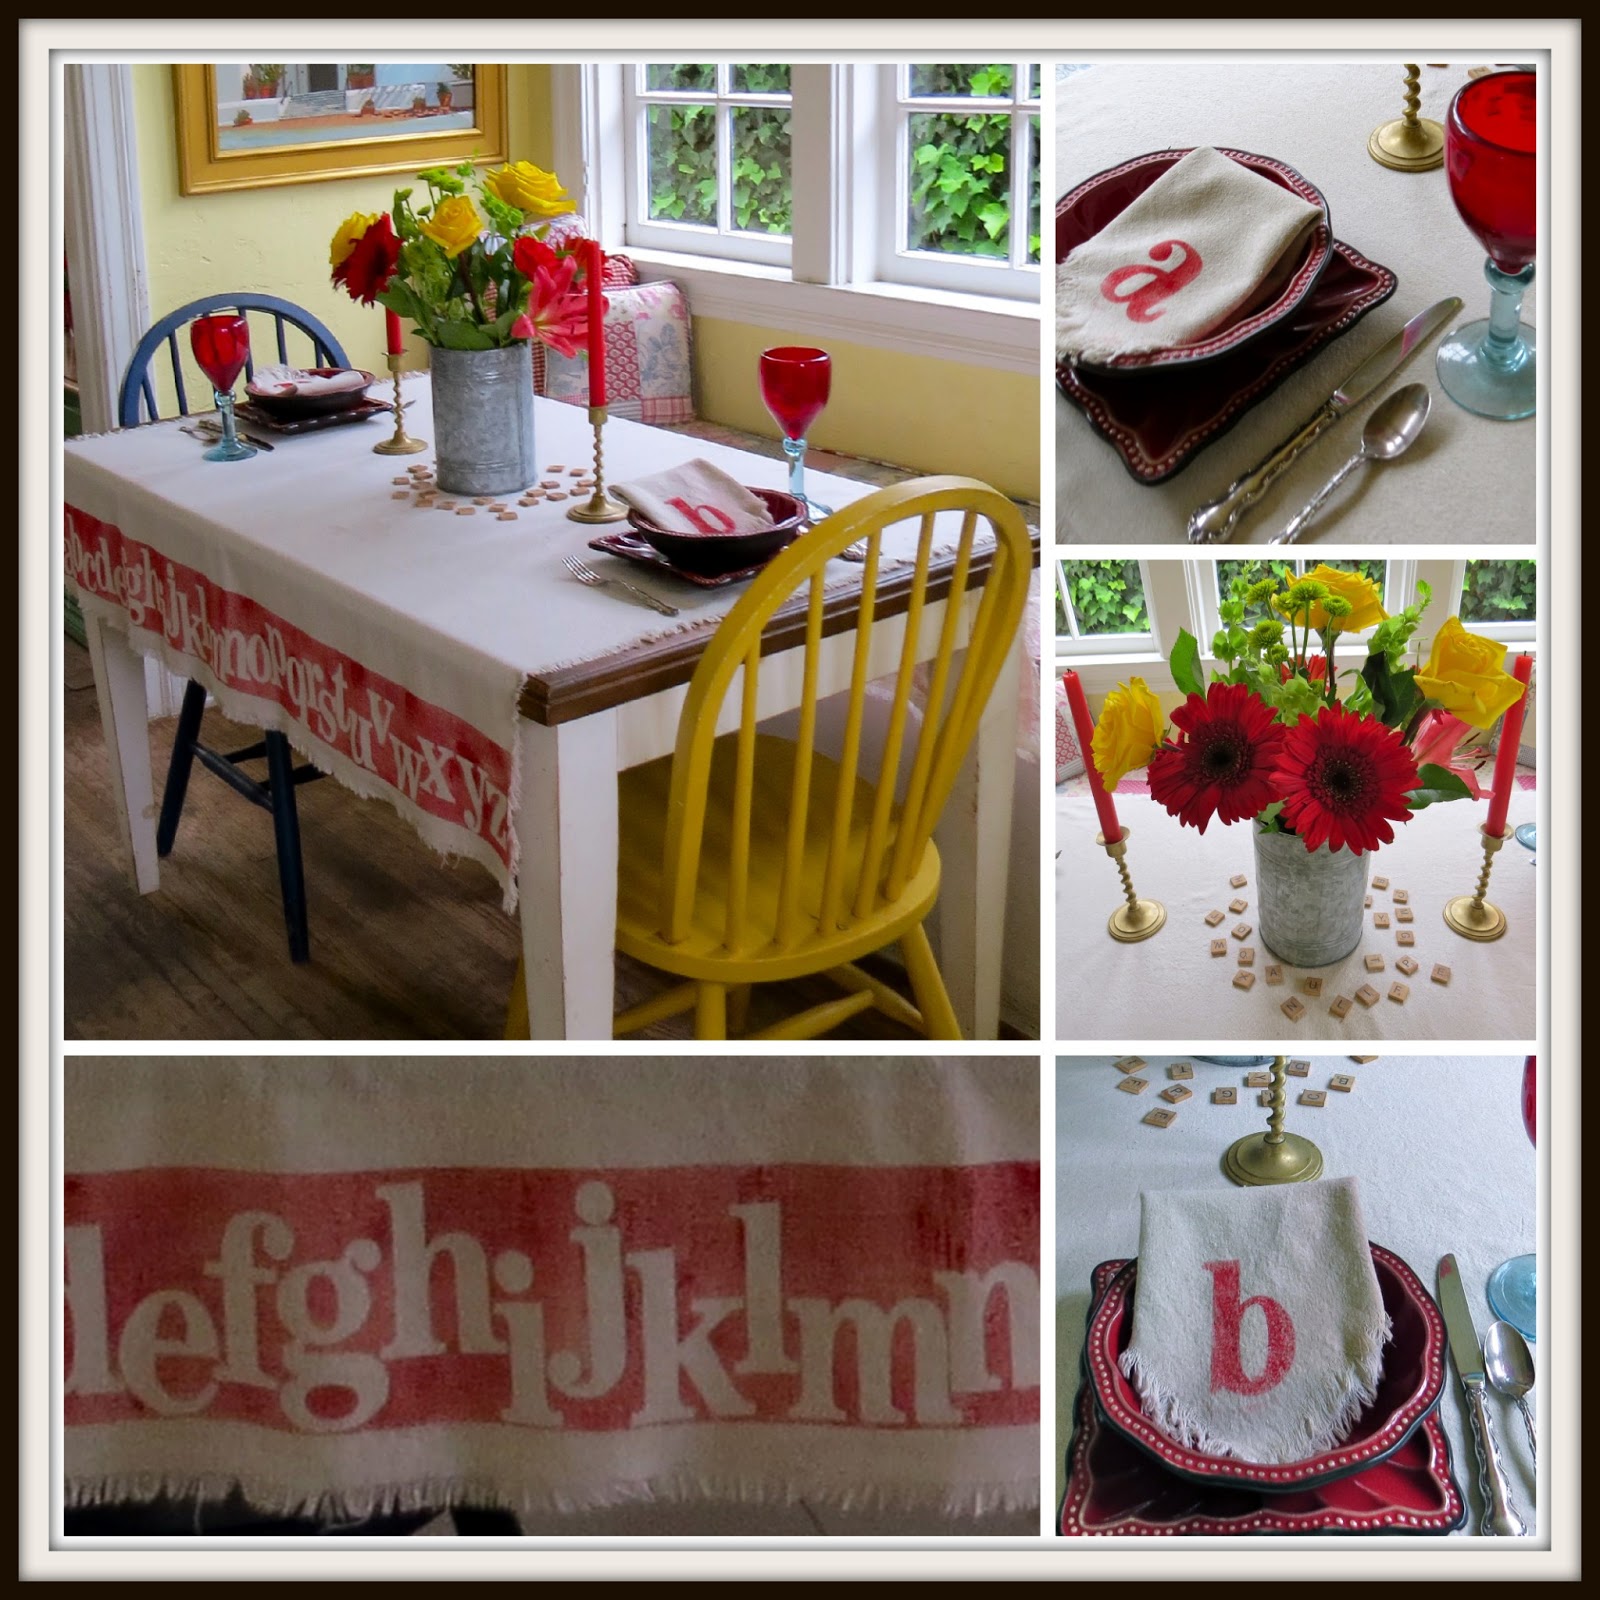
The other side got numbers for a different look.


I used an idea from my 'Lovely Linens' Pinterest board as inspiration for the napkins.


There were still 6 napkins left so they became today's project.


I bought some Tim Holtz metal pieces the other day and simply tied them onto the napkins with jute.


Now, I imagine myself finishing reading  The Secret Keeper and going for a swim.

What are you up to today?

. . . . . . . . . . . .

I am partying at these great sites

French Country Cottage - Feathered Nest Friday

The Charm of Home - Home Sweet Home

Common Ground - Be Inspired

Rooted in Thyme - Simple and Sweet Fridays

House of Hepworths - Hookin' Up With HoH

No Minimalist Here - Open House Party

The Shabby Creek Cottage - Transformation Thursday

Saturday, June 8, 2013

30 Days of Pinterest

Usually, the day after school is out, I begin working on my summer project list.

This year is different because I am not on summer vacation.

I am on vacation for life, so to speak.

So, now is the time to do all those things I said I would do when I had the time.

After reading the post A Simple Pinterest Project by Judy at 20 North Ora.

I went to my Pinterest boards and chose 30 projects.

There are things to make, things to buy, bits and pieces to gather and vignettes to mimic.

The goal - complete the 30 projects in 30 days -

June 8 to July 8.


Polka dot container

Film reels
    
Eyelet napkins


  Colorful quilt

 Green Bench

  Metal chair

  Stenciled bucket


 Old door

 Fun Scrabble tiles

Felt Letters

Metal labels


Heart Tags

Crate 

Wash tub

Linen napkins


Numbered containers

Sweet yellow vignette

Galvanized tins


Floral plates


Windowseat cushion

Sweet heart

Colorful utensils


Steps to the Beach sign

altered globe

garden dresser

The shop teacher cut out the wooden sign for me to paint and the linen table cloth to stencil arrived yesterday.

The countdown begins.

Wish me luck!

. . . . . . . . . . . . .

Between projects, I'll be partying at

My Romantic Home - Show and Tell Friday

Thursday, January 3, 2013

Finding My Identity

If someone asked me my decorating style, I would be hard pressed to answer.

I just do and use what I like, even if it isn't in style.

Two incidents occurred recently that made me sit up and think about how others might describe my style.

Someone posted on their blog how to see what photos of yours have been pinned on Pinterest.

http://pinterest.com/source/your website here

I was surprised to see a photo of my dining room and even more surprised when I read the pinner's description.

LOVE the cheerful, laidback, bohemian vibe of this house.

Bohemian?

Me?

I always think of myself as so straight laced.

The second incident was our home being featured in Ventana Monthly, a local magazine.

I was intrigued when I read Lisa Snider's description of my blog.

"Carol's work has also spilled over into crafting handmade books and cards, which, in addition to her designs and decor for the home, are all detailed in words and photos on her whimsical blog."

If anyone asks me my decorating style, I guess I now have to say

Whimsically Bohemian.

Or, is it

Bohemian Whimsy?

Either way, I chose to embrace it yesterday when I started my second project of the new year.

I bought these little stools when we had our dining room table built.


Originally I had a stool at each end of the table and a bench opposite the window seat.


Steve hated the arrangement because he sat on the bench and preferred having seating with a back.

I gave the stools to JP and he recently returned them to me.

They move around rooms -

sometimes in the kitchen

and sometimes in the closet so I can stand on them to reach high shelves.

Lately, we have been using them in the living room while we play games around the fire.

I also have a taller stool Steve uses to hold his can of gesso when he is prepping a canvas.

It was covered with globs of paint,

I wanted to "liven up" the stools so I grabbed Steve's electric sander, Annie Sloan Chalk Paint from the garage, some brushes and I was in business.


I wanted to paint stripes, checks and dots on the legs, but I am not a very good painter so I settled for just doing each stool in two different colors.

My supply of ASCP consists of my color palette  - red, yellow, green, blue and white.

All day, I thought about how to make them more interesting.

Numbers would be easy, but I have sort of overdone it on numbers lately

and

I just order these galvanized number boxes today from Sav On Crafts.


So for the taller stool, I decided to write the word SIT.


I typed SIT on a power point slide using the stencil font and created my own stencil.


I decided on the alphabet for one stool.


I used rub-on letters and it was much more difficult than I expected.


Some rub-ons are easier to use than others.

And, when I waxed the stool I wasn't careful and some of the letters got smooshed (is that a word?) and I had to use a black sharpie to fix them.

My plan had been to use rub-on words for the final stool, but after waxing the alphabet stool, I was afraid it might not turn out.

So, a simple question mark adorns the final stool.


I created a stencil for the question mark also.


With a bit of paint and a bit of wax, I have three much improved stools.


One little stool sits in the kitchen so I can use it to reach the top cupboards.


The other little stool is in our spare bedroom so I can reach things on the closet shelf.


The tall stool is sitting in front of my work space telling me to SIT and get creative.


I will embrace my new identity in another project tomorrow.

Whimsical?

Bohemian?
................................................

I'm linked up at

Jennifer Rizzo - Fabulously Creative Friday

Savvy Southern Style - Wow Us Wednesdays

Rooted in Thyme - Simple & Sweet Fridays

The Charm of Home - Home Sweet Home

Redoux - Link Party

Romantic Home - Show and Tell Friday

No Minimalist Here - Open House Party

Shabby Creek Cottage - Transformation Thursday


Sunday, December 30, 2012

Time For Creativity

I am loving winter break.

I don't know how it happened, but we ended up with nearly 3 weeks off.

The first week was for vacation.

The second week was for cleaning and reorganizing.

But, today is the beginning of a week that is all mine.

After a long walk on the beach this morning, we came home to

a clean house,

no laundry to do,

all the Christmas decorations put away,

and nothing urgent to be done.

Steve headed off to the meat market to choose something for dinner.

I headed to "the" studio.

I designate it as "the" instead of "Steve's" because I now I have my own little corner to work.

I really like this basket I saw last summer at one of my favorite antique stores, American Home and Garden.


My plan was to stencil numbers on these baskets.


I couldn't find any stencils so I thought about printing out numbers and creating my own stencils.

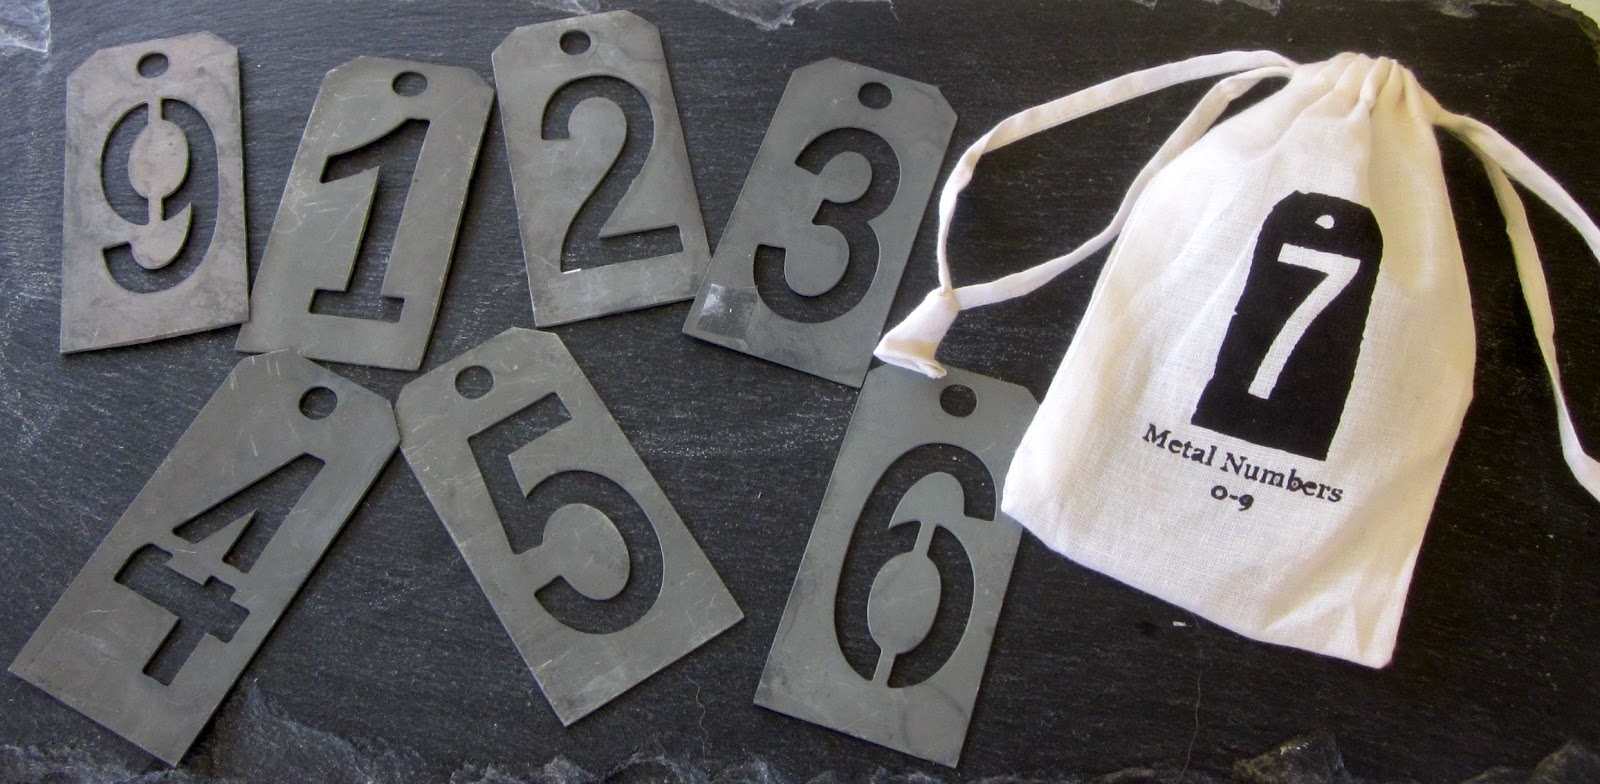
Walking to the computer, I passed my Ikea Expedit and realized I had zinc number stencils.


I ordered these on-line, but can't remember the source.  


I have had them for several years and only used the 8 on a bottle.


I figured that I could wash the paint off the zinc so I got out white paint, but when I set the stencil on the basket, I liked how it looked.

The project became a whole lot easier and was finished rapidly.

I simply tied the numbers onto the baskets - no paint, no spills, no clean up.


I was finished in less time that it took Steve to do the grocery shopping.

It was nice to get a little time for creativity.

..........................

I am linked up at

Bliss Ranch - Cowgirl Up Party

Between Naps on the Porch - Metamorphosis Monday

Twigg Studios - Sunday Show Off Linky Party

Alderberry Hill - Make the Scene Monday

Under the Table and Dreaming - Sunday Showcase Party

Boogieboard Cottage - Masterpiece Monday